Setting a static IP address for your Pi is sometimes needed. If needed due to application or testing the question comes in which is the best method. Would the best method be setting it via the router or via the Pi itself. I would personally say setting it via the router is the best option as it gives you more control on your over all network. If you cannot do it via your router then follow the below or you can reference this link. Since we have the desktop GUI installed I would suggest the below. If you prefer to be more adventurous and want to learn more click here to go to the command line how to.
Configuring Static IP Addresses Graphically
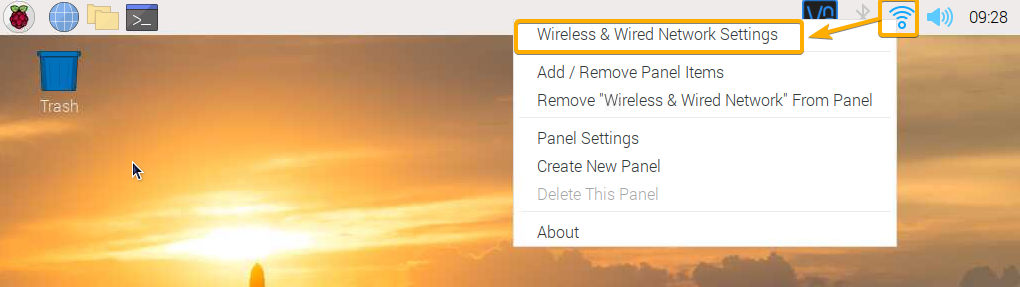
Right click on the network icon and click Wireless & Wired Network Settings.
Make sure that interface is selected in the dropdown menu.

Click the empty dropdown menu, as marked in the screenshot below.
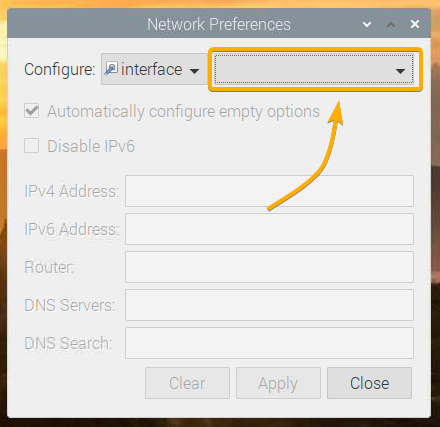
Select the network interface you want to configure.
eth0 – the wired ethernet network interface.
wlan0 – the wireless (WiFi) network interface.

Suppose you want to configure the wlan0 Wi-Fi network interface of your Raspberry Pi system.
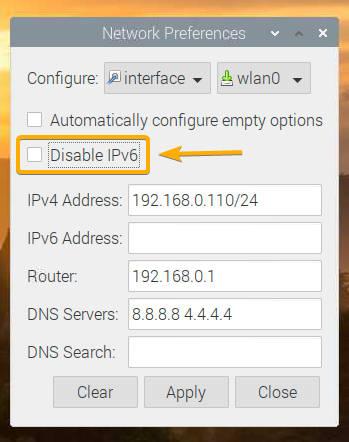
After selecting the network interface you want to configure, you should see the following window.
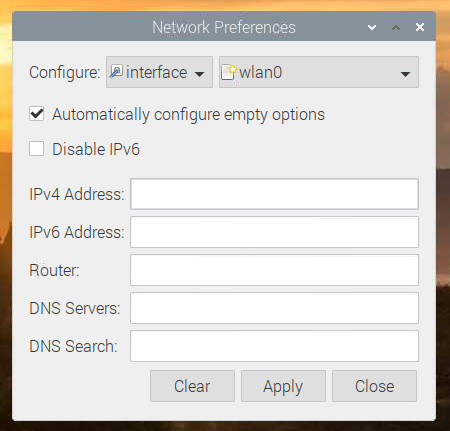
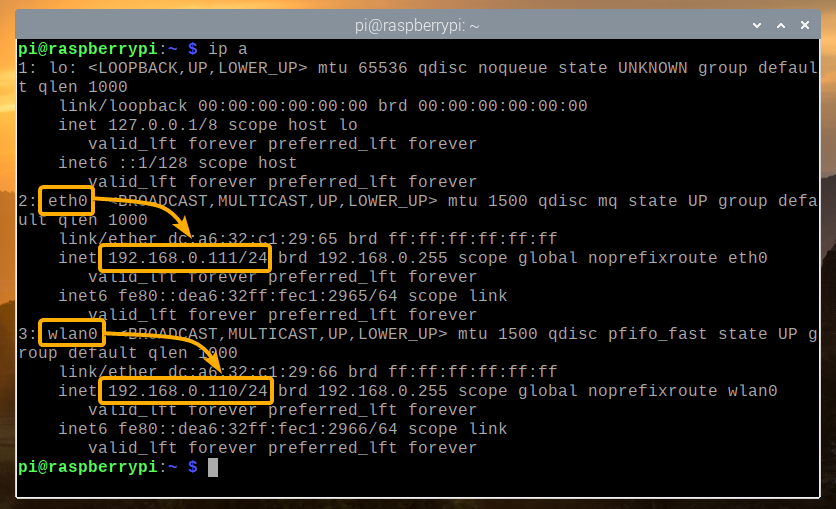
Type in your desired static IP address, gateway (Router) address, DNS server address, etc. That you can get from your router or by running he command to get the current IP address information of your Pi and added it as per the picture below
ifconfig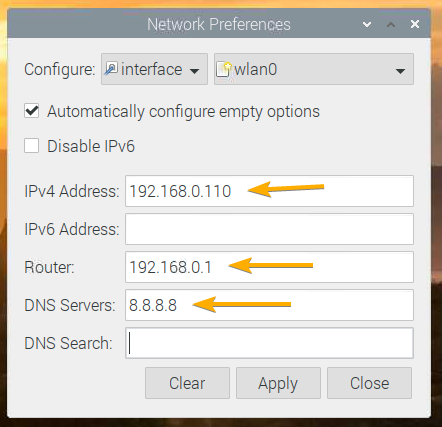
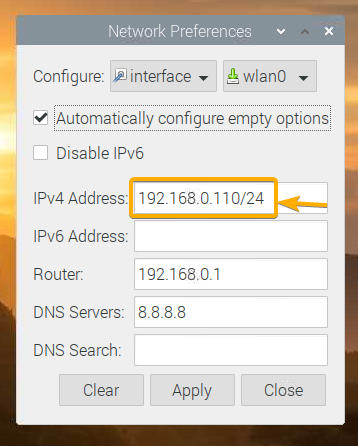
If you want, you can also type the IP address in CIDR notation, like 192.168.0.110/24. Here, 24 is the subnet mask length. 24 is equivalent to the subnet mask 255.255.255.0.
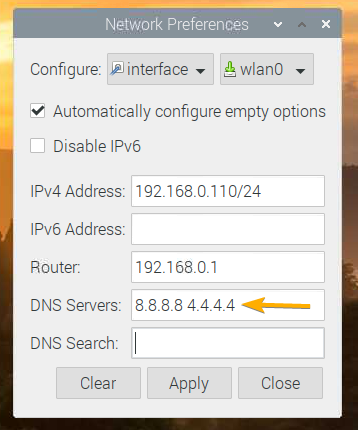
To add multiple DNS server addresses, simply separate them with a space, as shown in the screenshot below.
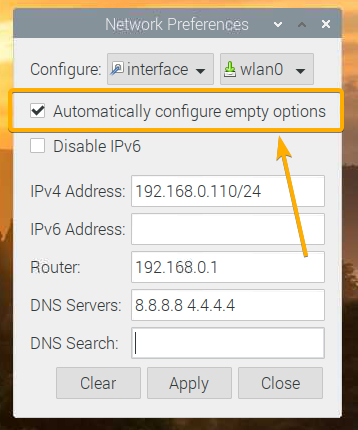
If you only know the IP address you want to set and nothing else about your home or office network, then selecting Automatically configure empty options will request the network configuration from a DHCP server, and will only configure the network information that you did not specify here.
If you know all the required network information, I recommend that you uncheck Automatically configure empty options, as this eliminates the need for a DHCP server on the network.
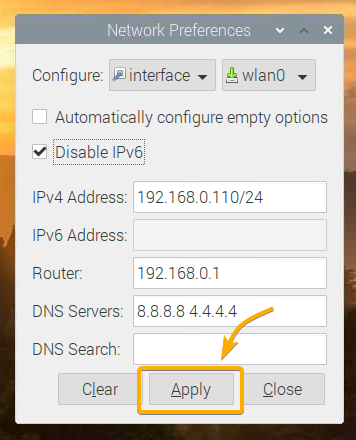
If you do not need IPv6, check the Disable IPv6 option.
Once you are done, click Apply.
Then, click Close to exit the Network Preferences window.
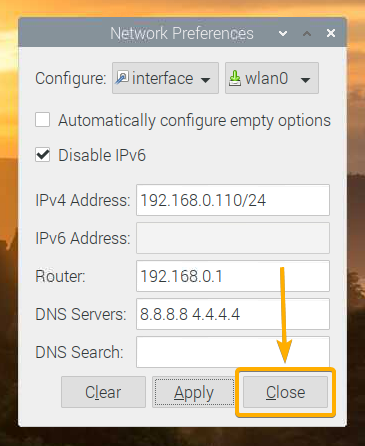
For the changes to take effect, reboot your Raspberry Pi
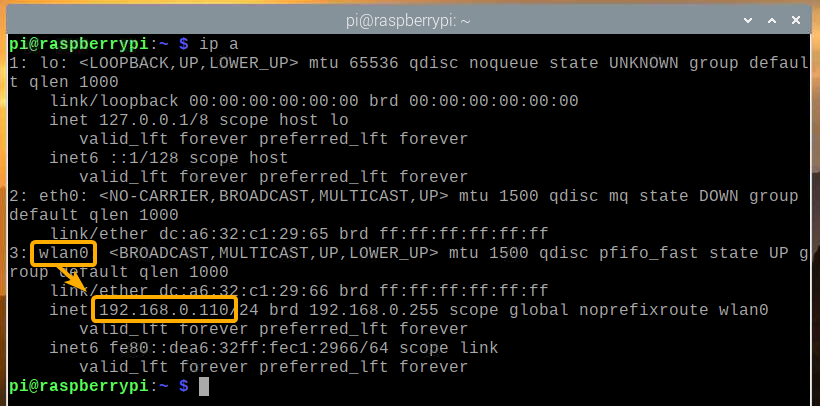
Once your Raspberry Pi boots, your desired static IP address should be set on your desired network interface.
You can confirm this with the following command:$ ip a
Configuring Static IP Addresses via Command-Line
If you are running the minimal version of the Raspbian OS (without any graphical desktop environment), or you just want to try configure it this way, good on you. From the command line, configuring a static IP address on the wired (eth0) or wireless (wlan0) network interface of your Raspberry Pi system is very easy.
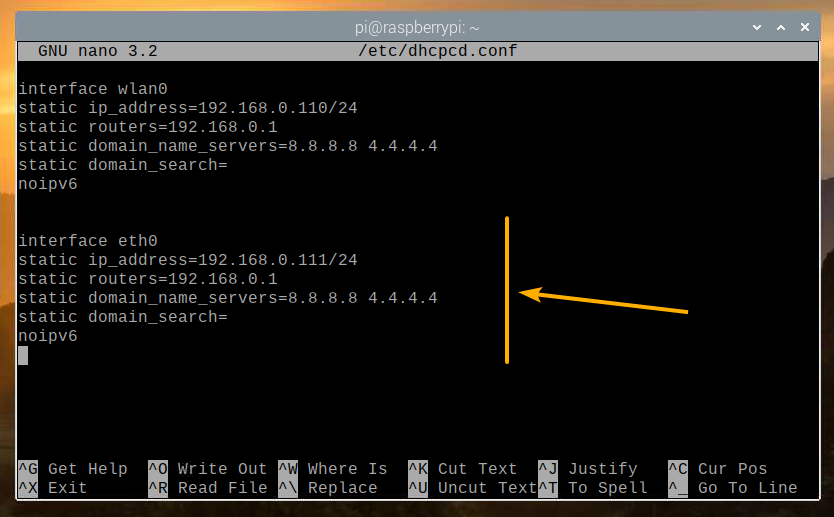
First, open the dhcpcd.conf configuration file with the nano text editor as follows:$ sudo nano /etc/dhcpcd.conf

To configure a static IP address for the wireless (Wi-Fi) network interface (wlan0), add the following lines at the end of the file.
interface wlan0
static ip_address=192.168.0.110/24
static routers=192.168.0.1
static domain_name_servers=8.8.8.8 4.4.4.4
static domain_search=
noipv6
NOTE: Make any necessary adjustments to the configuration (i.e., change IP address, change router/gateway address, change DNS servers) depending on your desired network configuration.

To configure a static IP address for the wired Ethernet network interface (eth0), add the following lines to the end of the file.interface eth0
static ip_address=192.168.0.111/24
static routers=192.168.0.1
static domain_name_servers=8.8.8.8 4.4.4.4
static domain_search=
noipv6
NOTE: Make any necessary adjustments to the configuration (i.e., change IP address, change router/gateway address, change DNS servers) depending on your desired network configuration.
Once you’re done, press <Ctrl> + X followed by Y and <Enter> to save the dhcpcd.conf configuration file.
For the network configuration changes to take effect, reboot your Raspberry Pi with the following command:$ sudo reboot

Once your Raspberry Pi boots, your desired static IP address should be set on your desired network interface.
You can confirm this with the following command:$ ip a